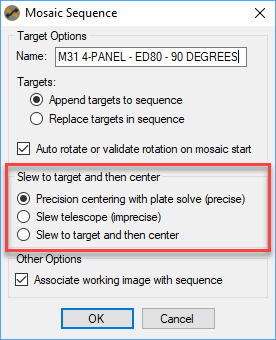
I am a bit confused. In the Mosaic Sequence interface a group of selection is titled “Slew to target and then center” and the group contains an actual choice named the same as the title of the group. Then inside the group there are two other choices: Precision centering with plate solve (precise), and Slew telescope (imprecise). I think the interface means to say these:
Target aiming preference:
[1] slew to and center
[2] slew only
[3] — I really can’t make sense of this one
I have looked at the help file and have not found a description. I use option [1] any way; I am hoping to get some clarification on these items.
Depending on the accuracy of your mount all are valid choices. #1 also slews. It plate solves first and then slews. However, #3 is a better choice since it slews the mount first to get it close before plate solving.
As has been said above both 1 and 3 will achieve precise centering. The difference is that 1 will start the centering process at the current mount location (solve, then slew, the solve again etc.) whereas 3 will first slew to the target (however accurate that might be depending on what was done before) and then start the centering routine. The advantage of 3 is that (as long as the mount already roughly knows where it is) the process will be slightly faster as the first solve should already be close to the target.
I agree that Mike has summed it up nicely, and that option 3 is the best way to go. The reason I have looked at this is because of multi-panel imaging, and it looks to me like under that condition you almost always need to slew from target to target and then precisely center. I understand that if you are imaging a panel, in a single or multi-panel session, that you might pause imaging while the mount is tracking and when you restart imaging all that you have to do is to ensure the scope is centered and you don’t need to slew to get to your “current” target.
I see this feature as being titled: “Slew & Center Behavior” instead of “Slew to target and then center” which is also the name of one of the options, and this will help with the clarity of this interface although it seems it is only confusing to me - it was, not any more.
Option 3 is the most practical option, and all these can be set at the target level any way.